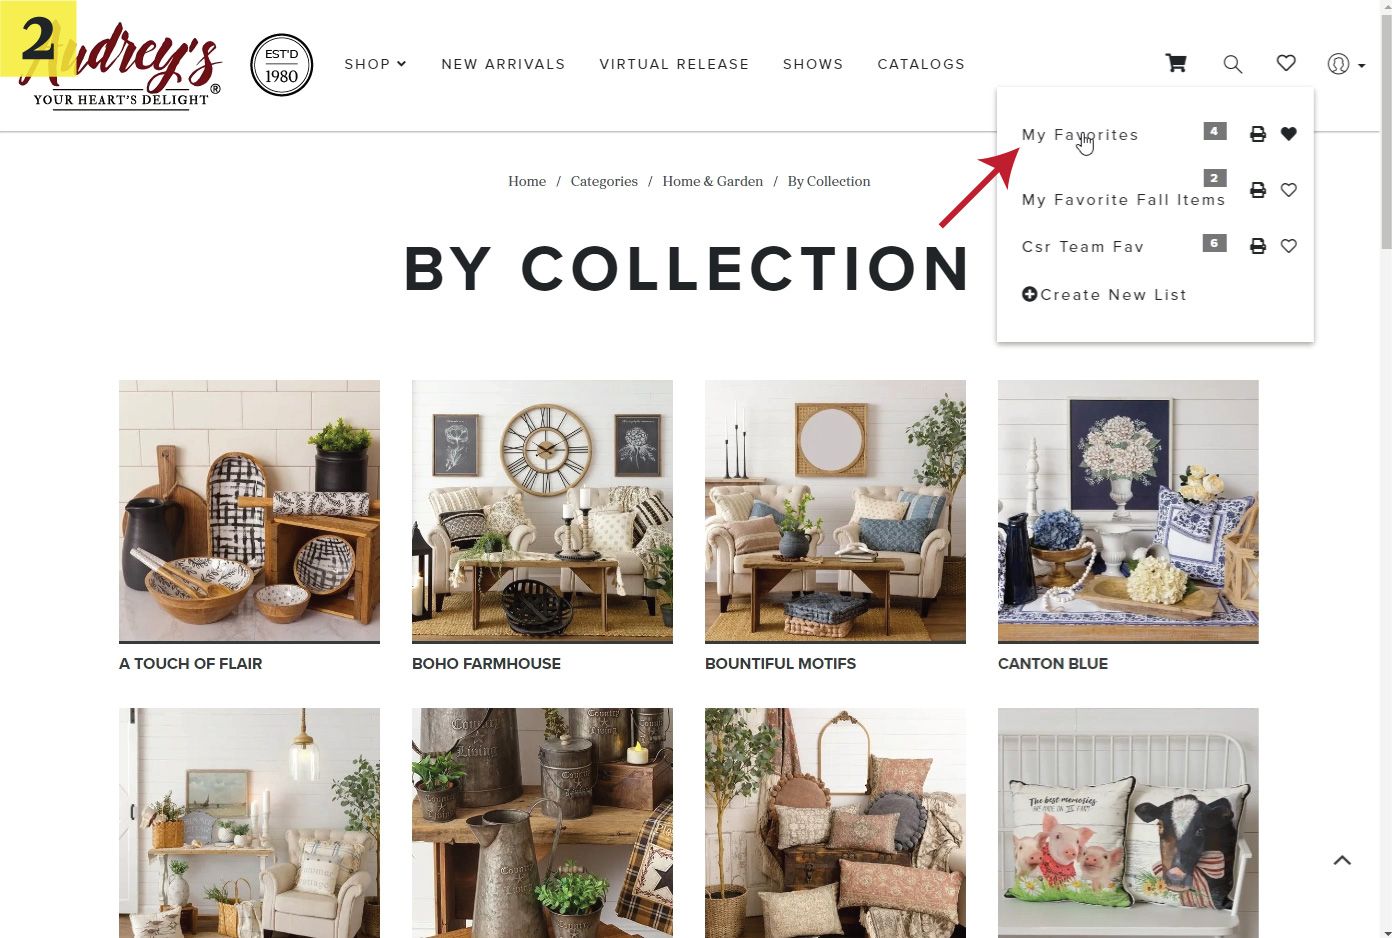
Features & Tips
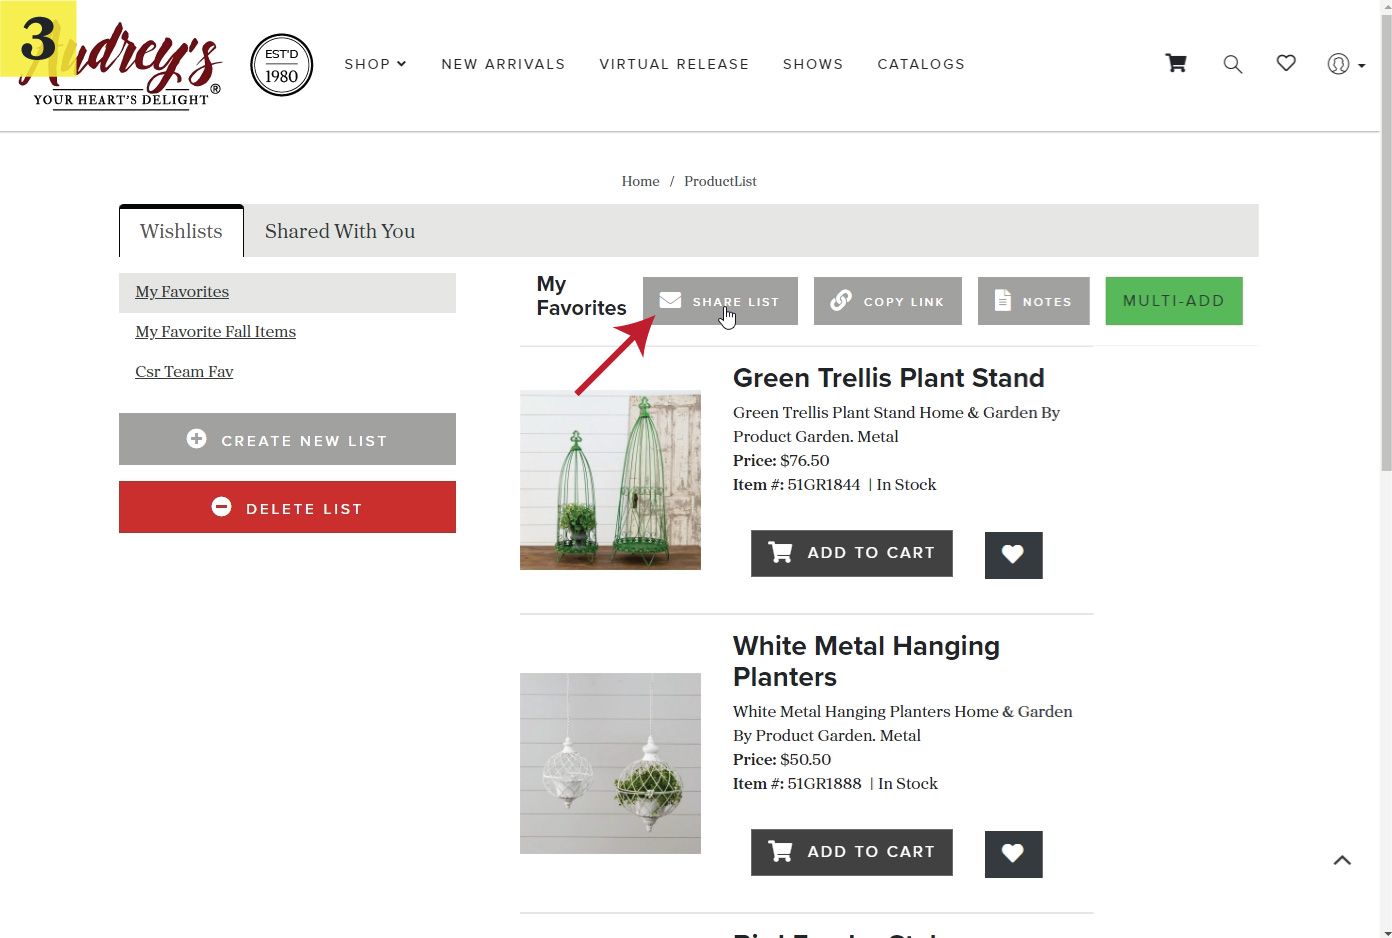
Share a Wish List
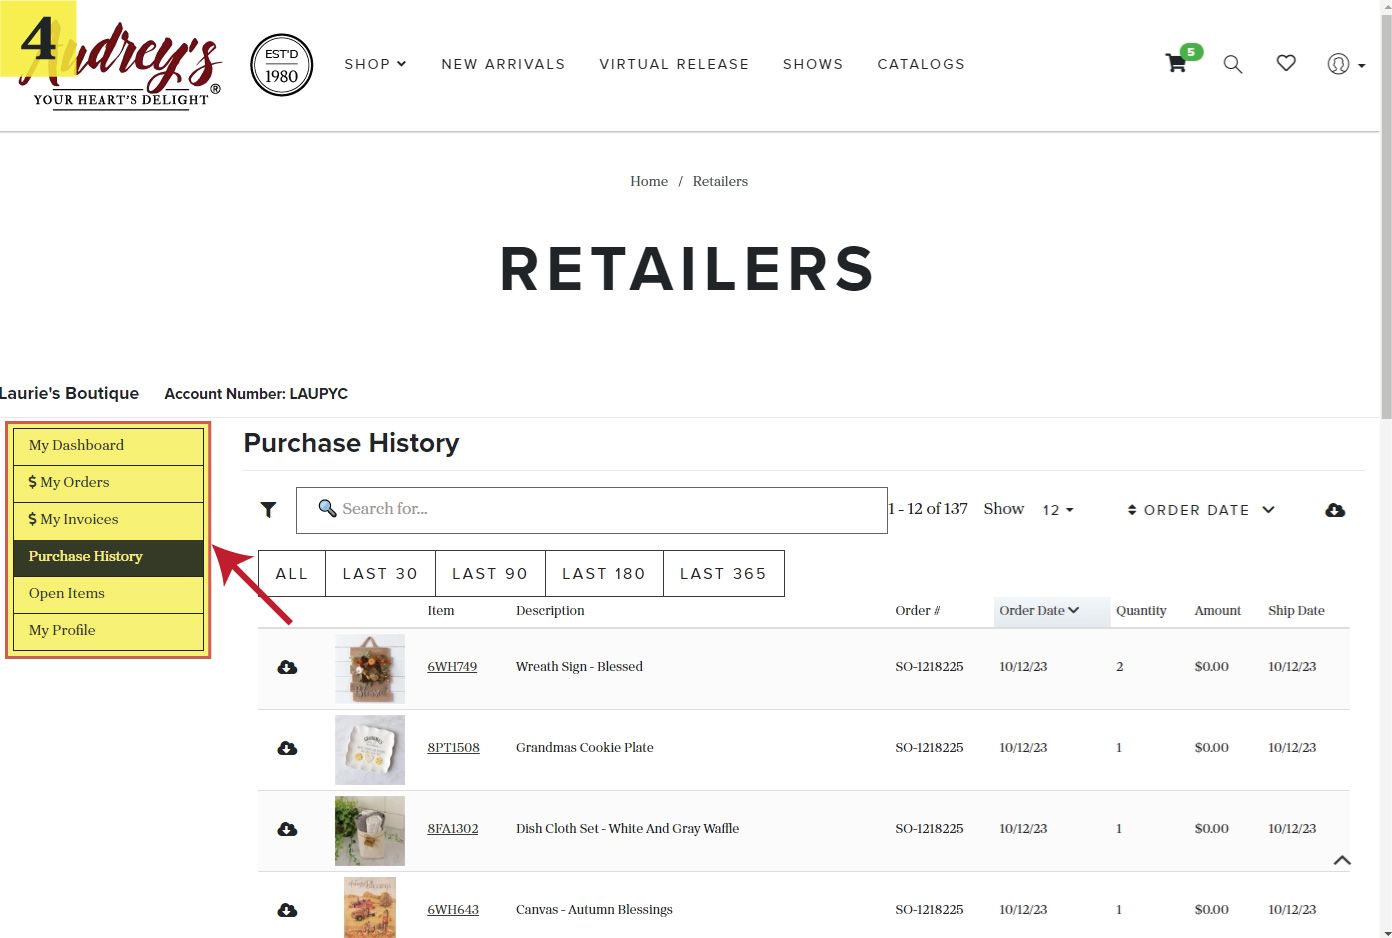
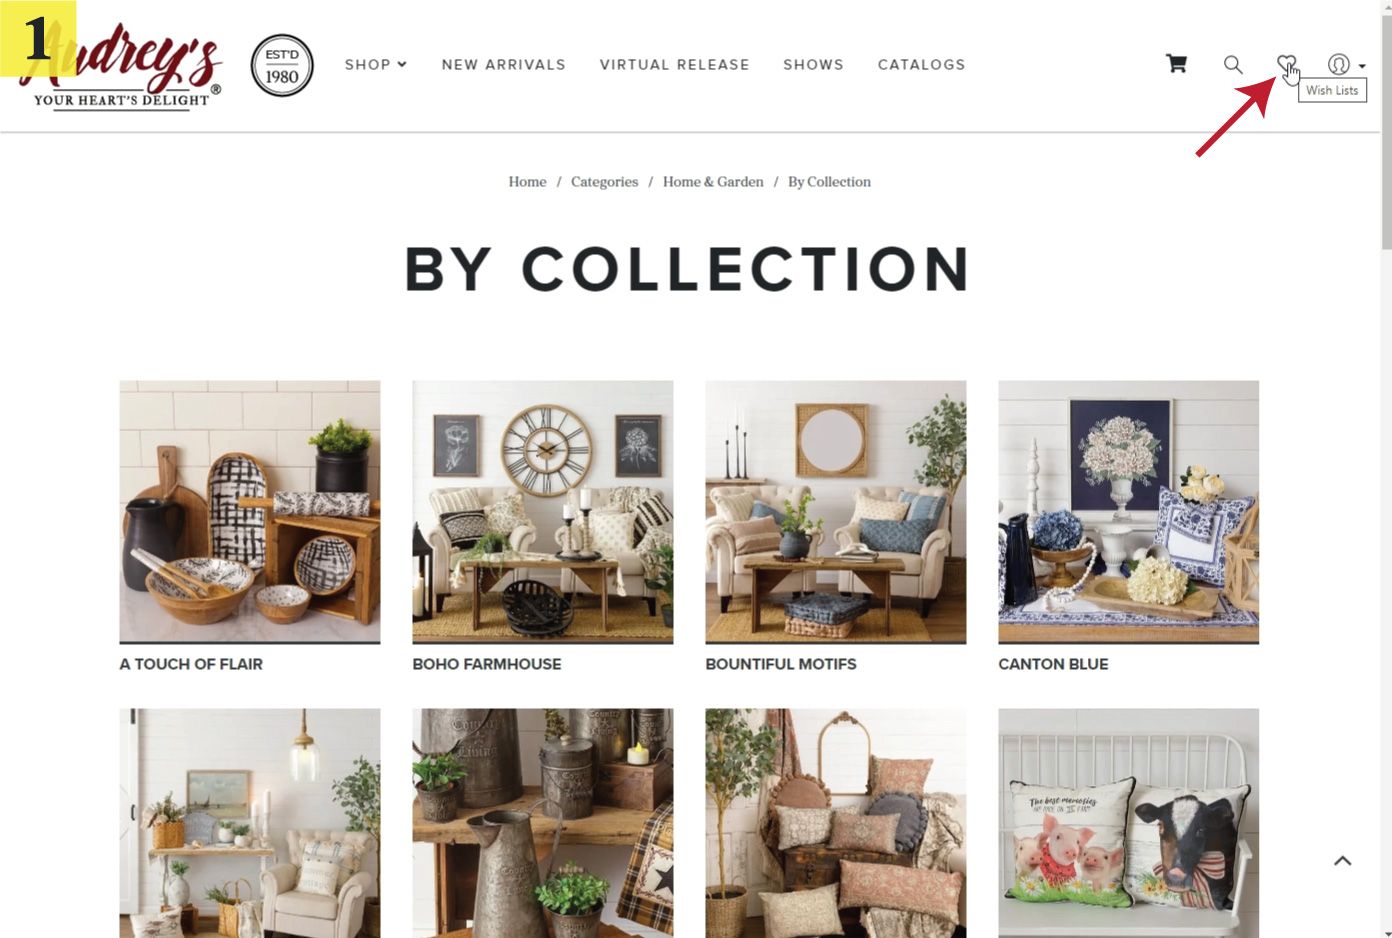
- Click the HEART ICON in the top right corner of the header
- Click on the name of the wishlist you would like to share
- Click on the "SHARE LIST" button
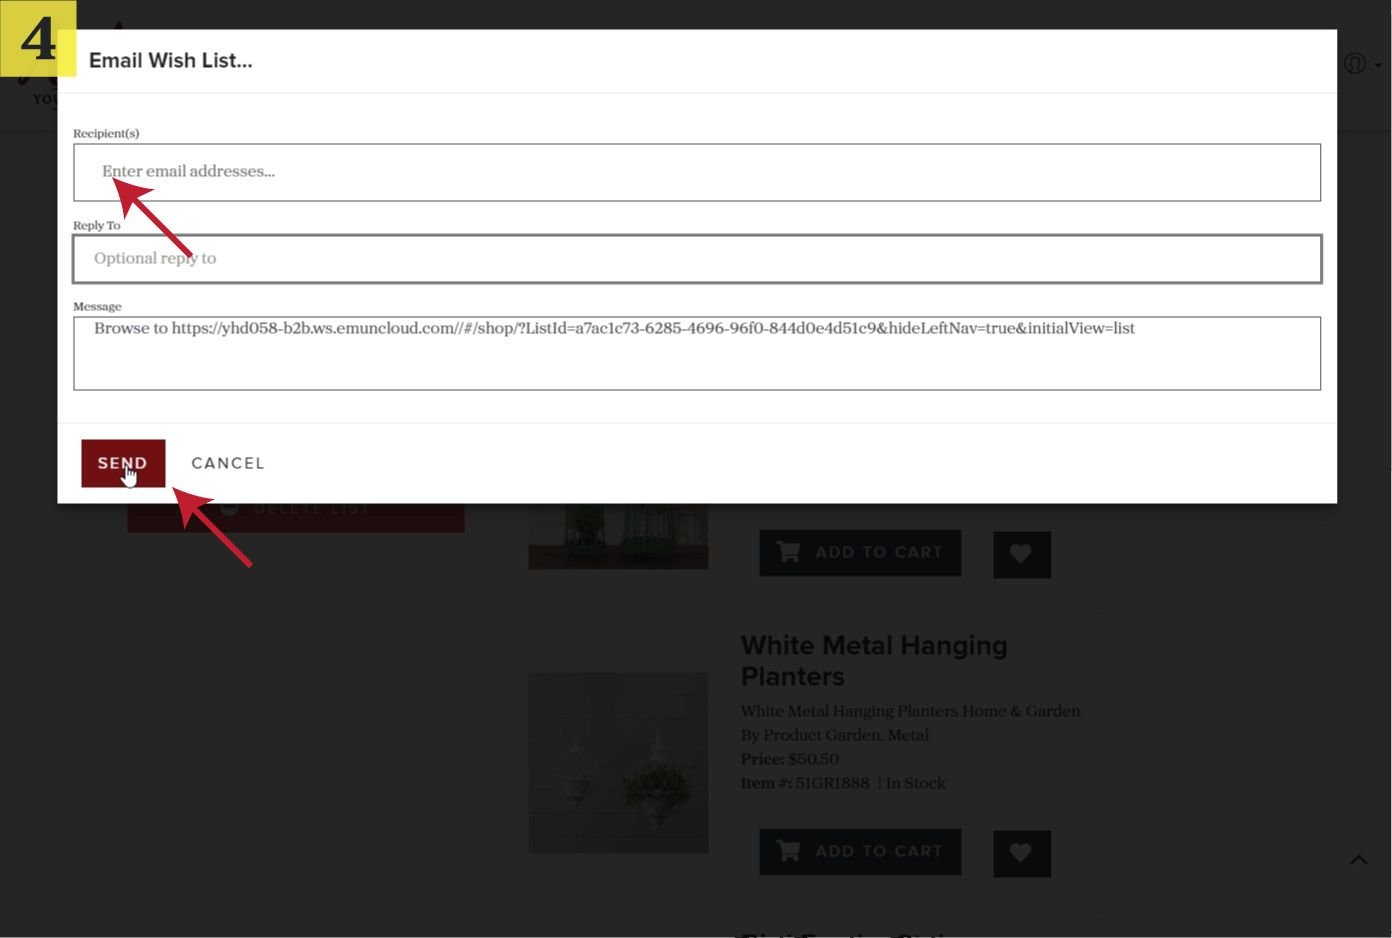
- Enter the email addresses that you would to share the list with, add a reply email address, and click the "SEND" button


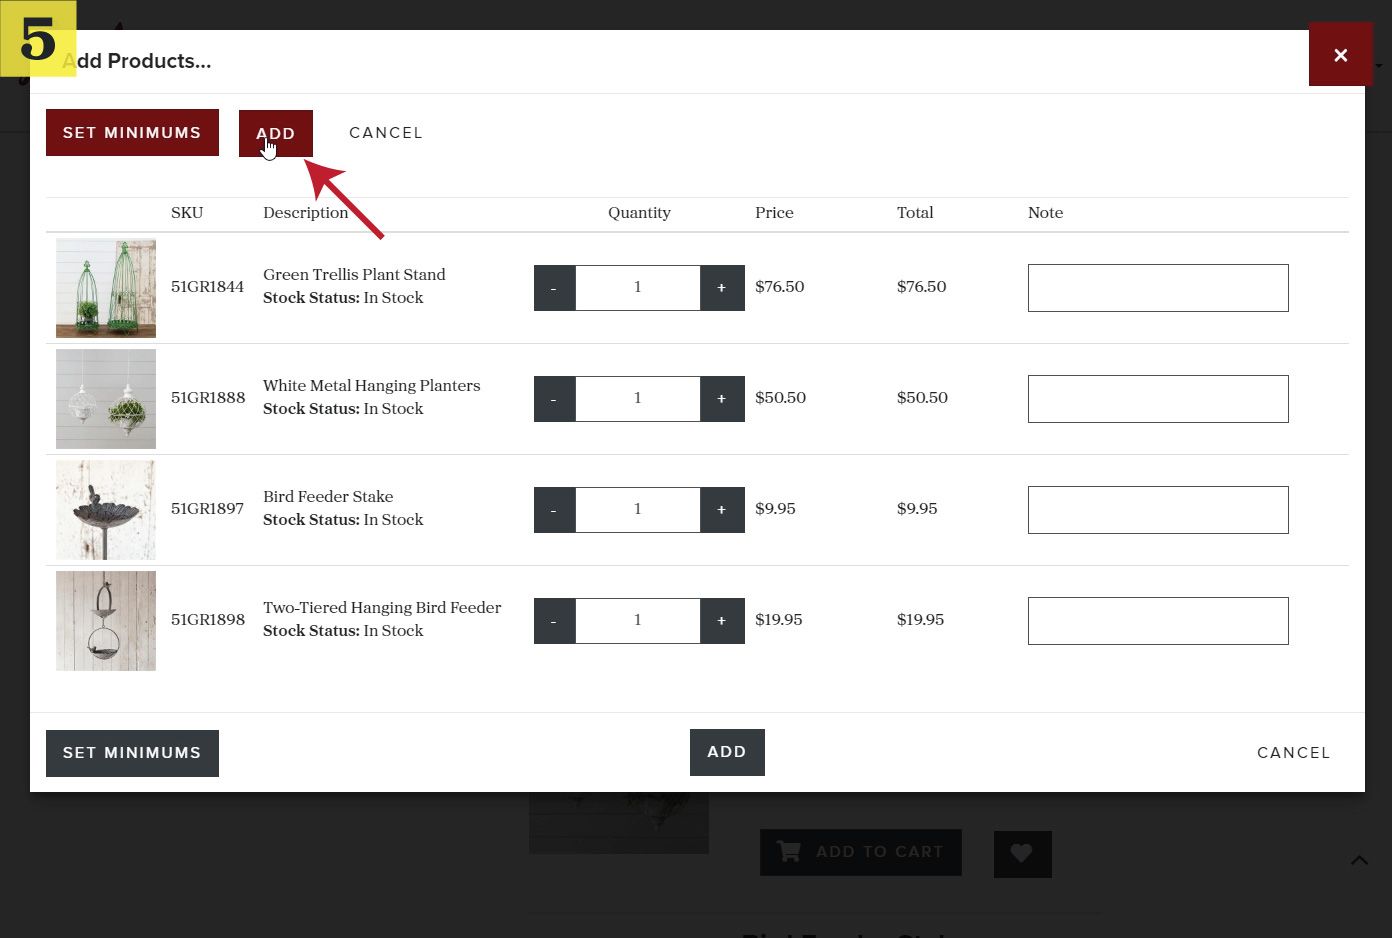
Add Wish List to Cart
- Click the HEART ICON in the top right corner of the header
- Click on the name of the wishlist you would like to add to your cart
- Click on the "MULTI-ADD" button
- Click on "SET MINIMUMS" button to change the quantity of each item to the minimum order volume
- Click on "ADD" button to add the items to your cart


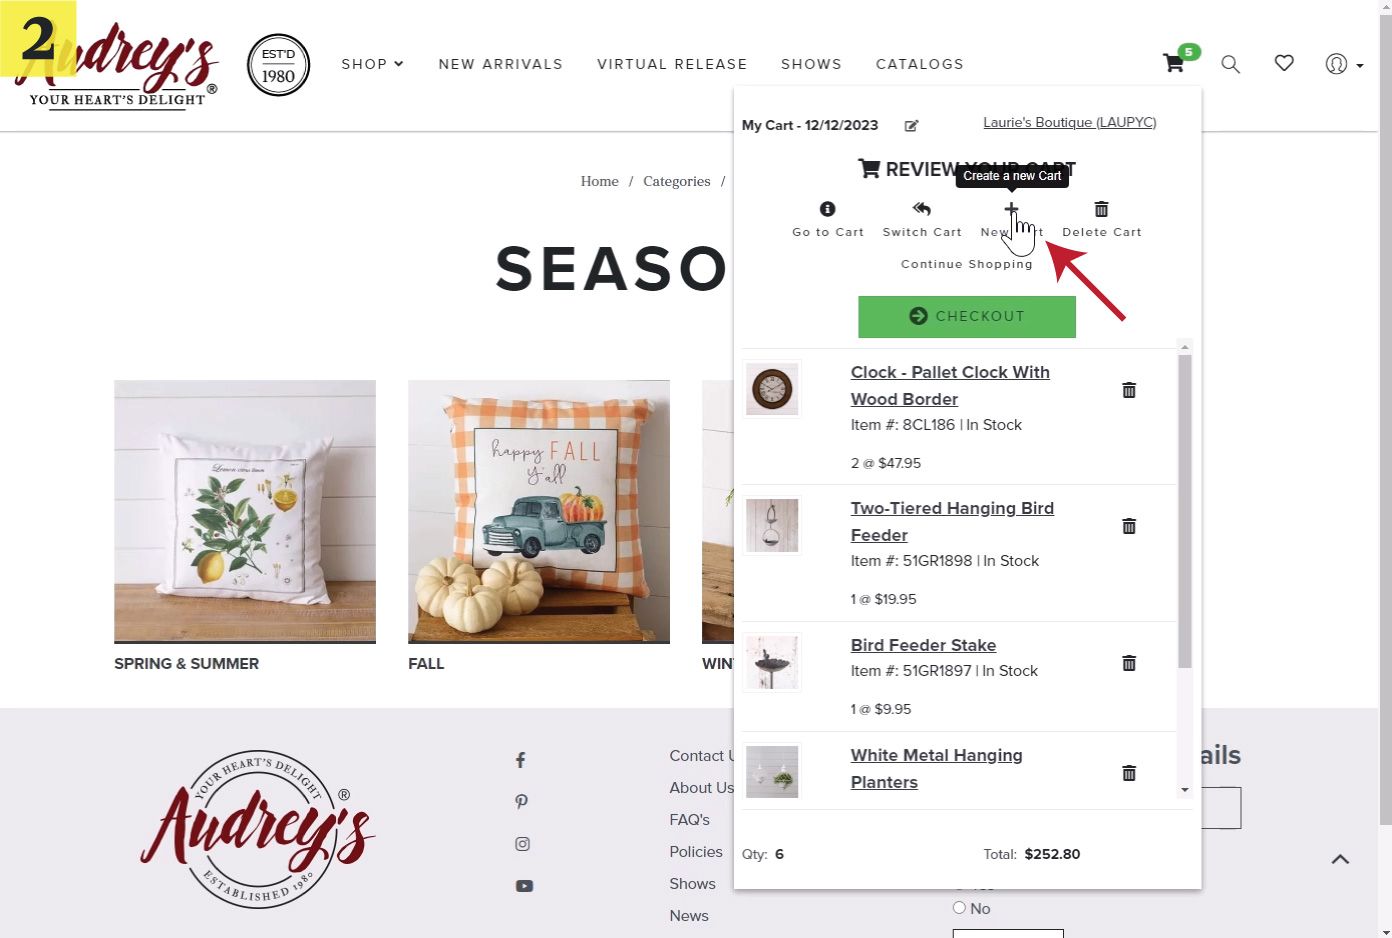
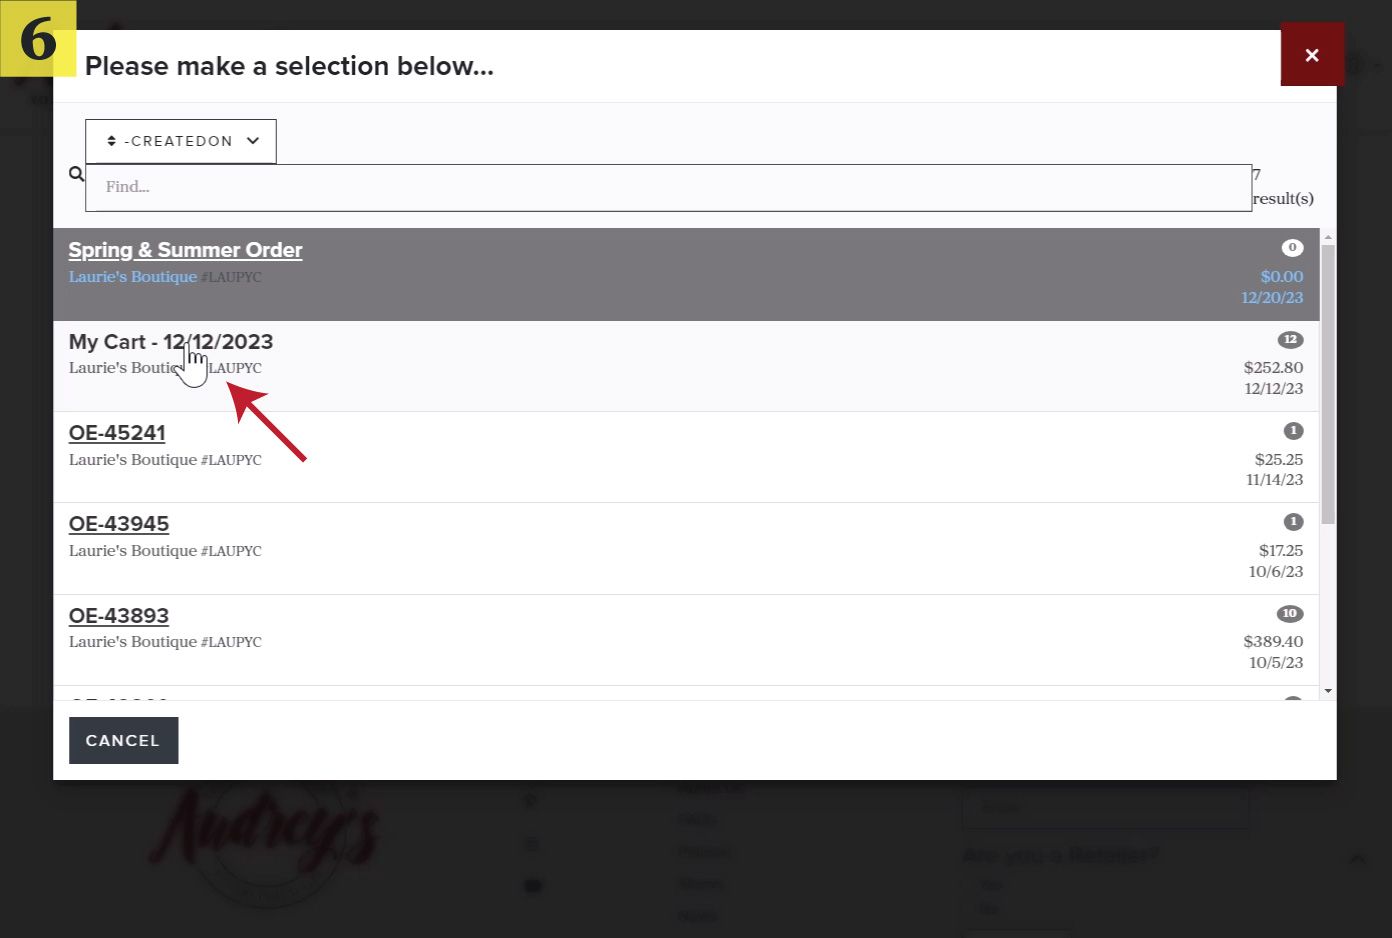
Multiple Shopping Carts
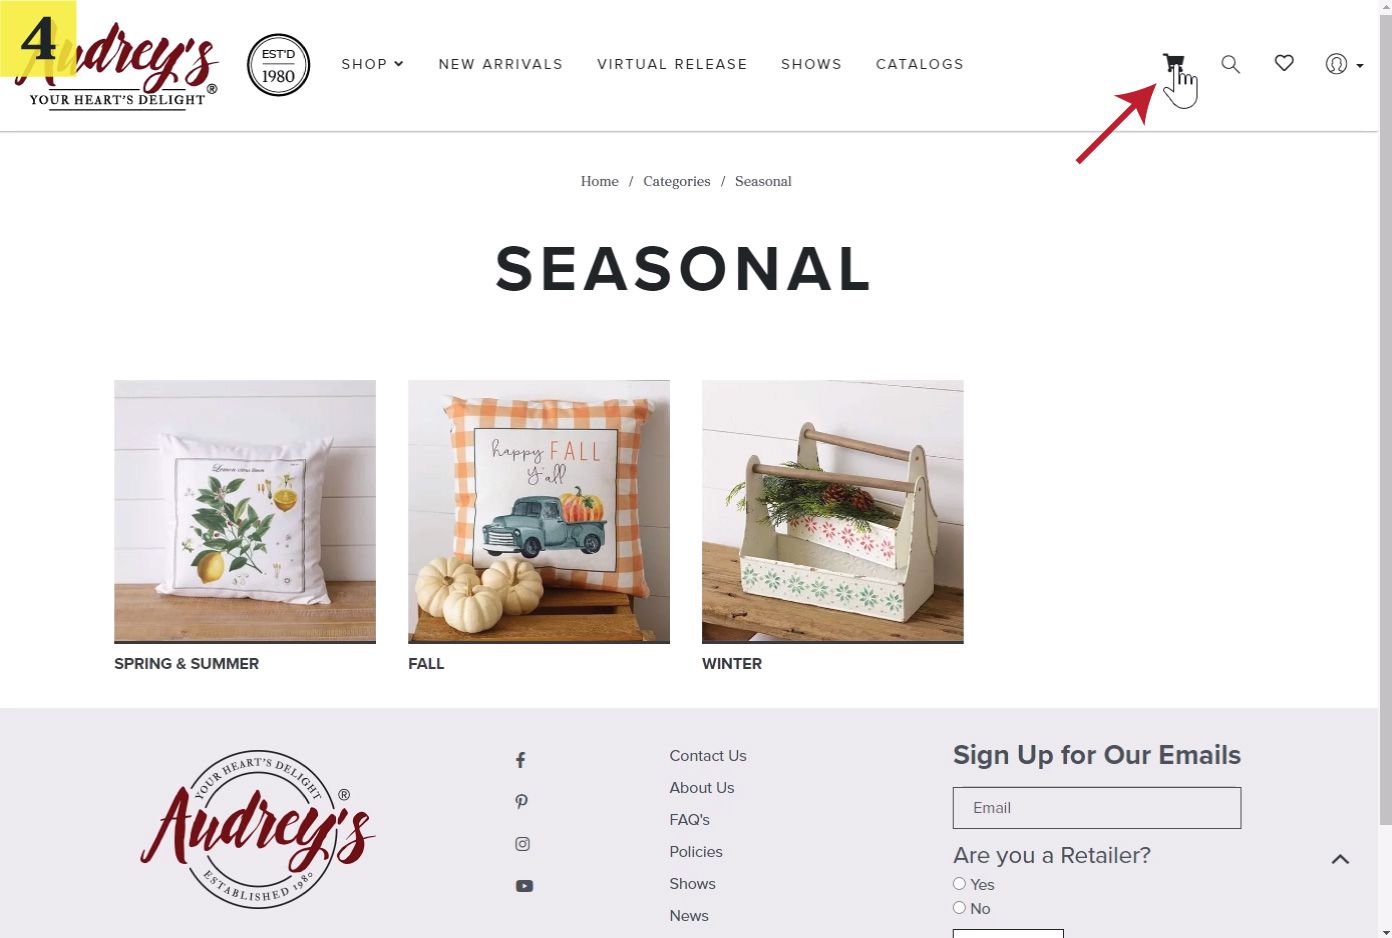
- Click the CART icon in the top right corner of the header
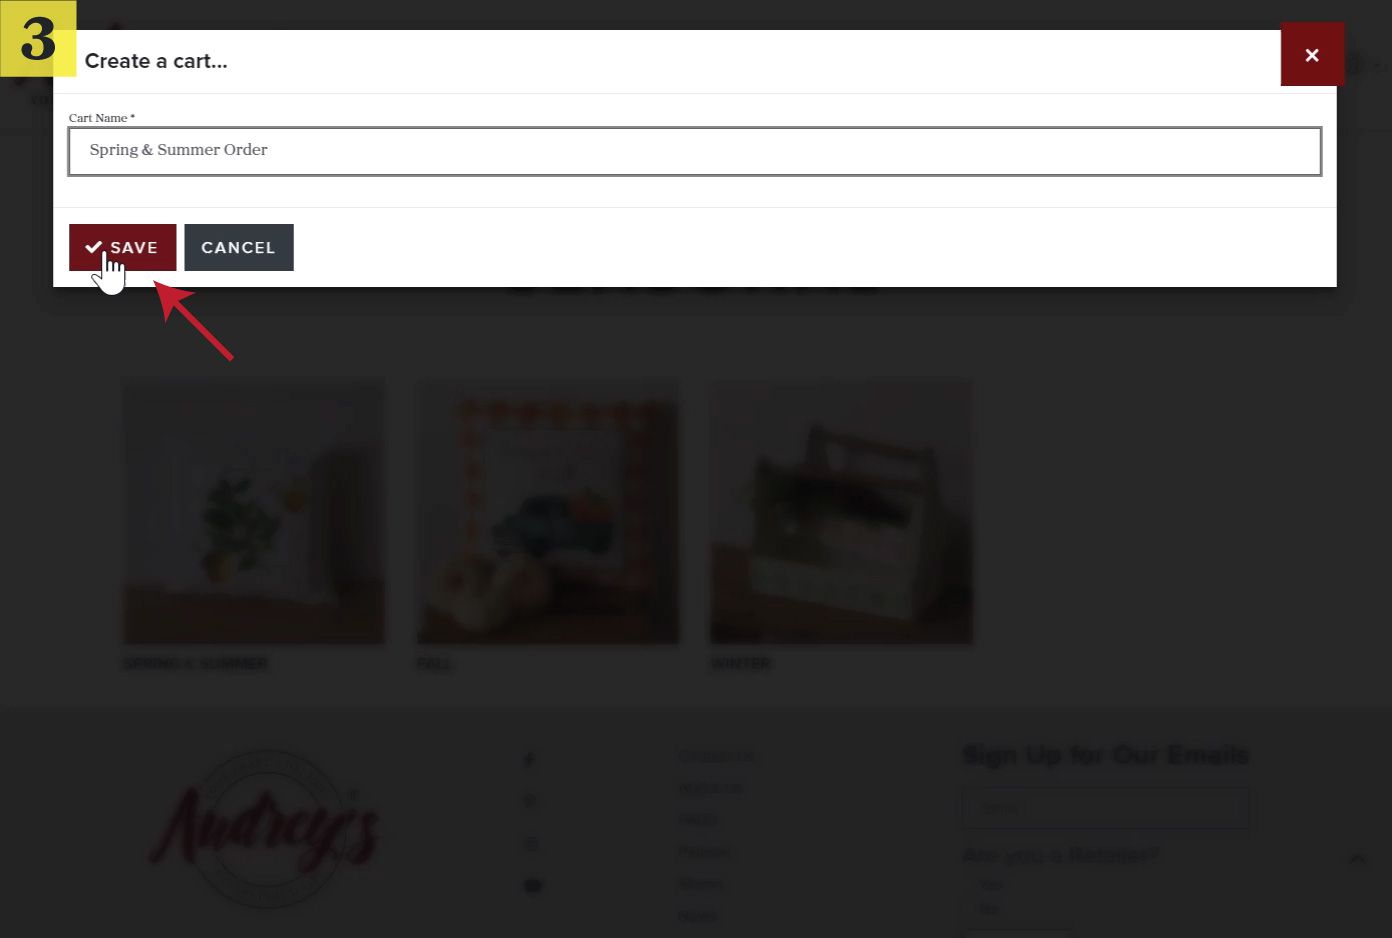
- Click on "New Cart" from the dropdown
- Give your new cart a name and click the "SAVE" button
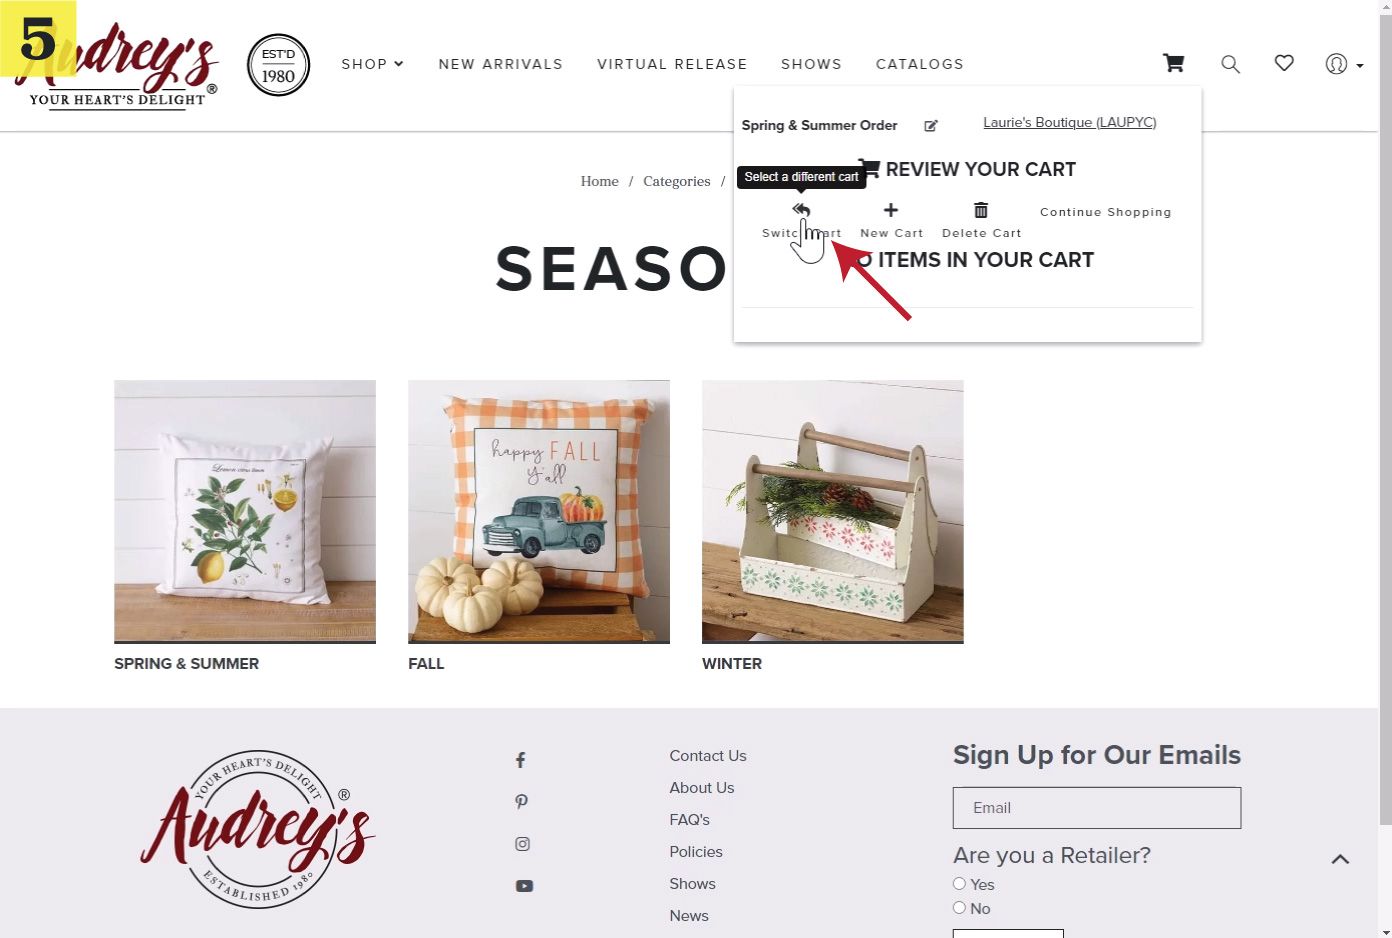
- To switch to a different cart, click the CART icon in the top right corner of the header
- Click on "Switch Cart" from the dropdown
- Select from your saved carts to make it the active shopping cart